Latest Drupal Step by Step Guide Improvements
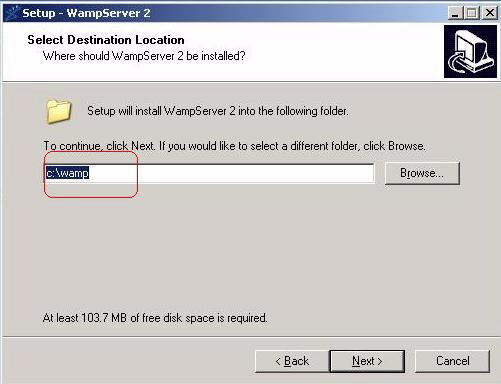
Note down the installation default path, i.e. c:\wamp.
www folder is present in c:\wamp folder. Here in www folder, one has to place the respective web applications.
There is no need of any other tools like “mysql-gui-tools-5.0-r17-win32 “ and EasyPHP for Drupal installation.WampServer has inbuilt server and database.
In Start -> Run: Type inetmgr.
Internet Information Services screen pops up.
Select Default Web Site under Web Sites and click on Stop item button at the top.
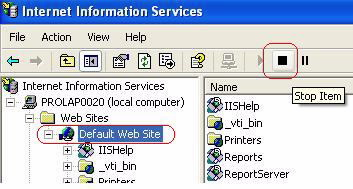
This is because by default, WampServer also uses 80 port.
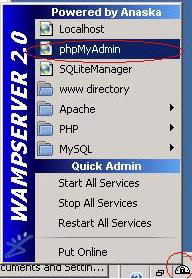
Observe WampServer icon at the right side bottom corner of the desktop.
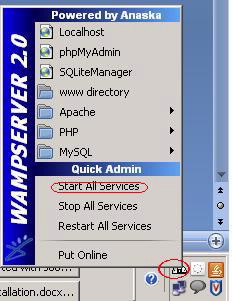
Left click on the icon and click on “Start All Services” (Right click contains options for exiting the WampServer).
Left click on the same WampServer and now click “phpMyAdmin”.
phpMyAdmin home page screen appears.
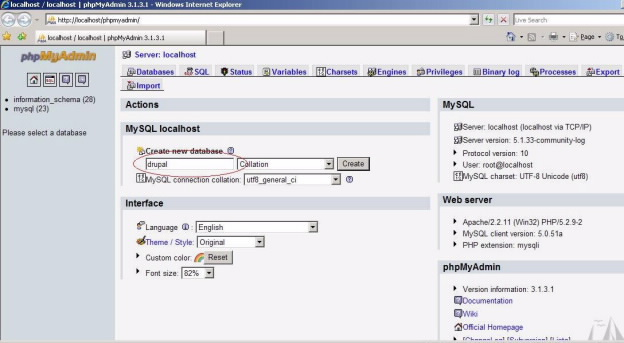
Give “drupal” as “Create new database” and click on create button.
Click on Privileges to see the default database credentials are:
- User: root
- Password: blank
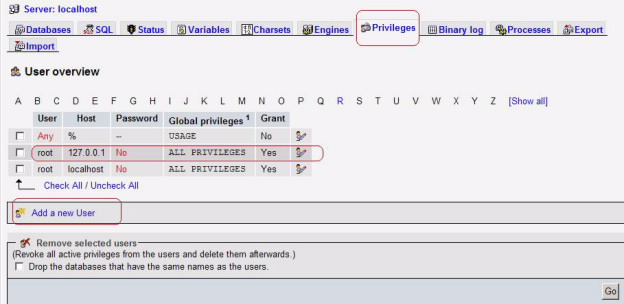
One can add new user also. Here default database credentials are enough for the Drupal installation.
Download Drupal 6.x from here .
Extract drupal-6.10.tar file to “drupal” folder.
Copy “drupal” folder in WampServer installation location, i.e. c:\wamp\www\.
Keep another copy of default.settings.php file (present in C:\wamp\www\drupal\sites\default folder) and rename it as settings.php file.
Then in browser, type http://localhost/drupal/install.php .
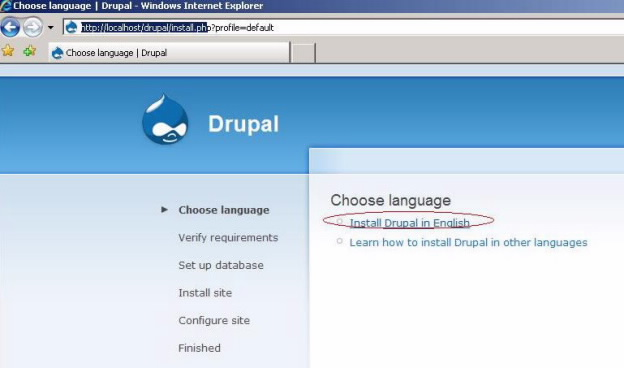
Click on “Install Drupal in English” link.
Then Setup database screen appears.
Choose language and Verify requirements are automatically checked.
Here I gave “admin” as the user name for the database which is not present in drupal database that was created earlier using phpMyAdmin. So it throws an error.
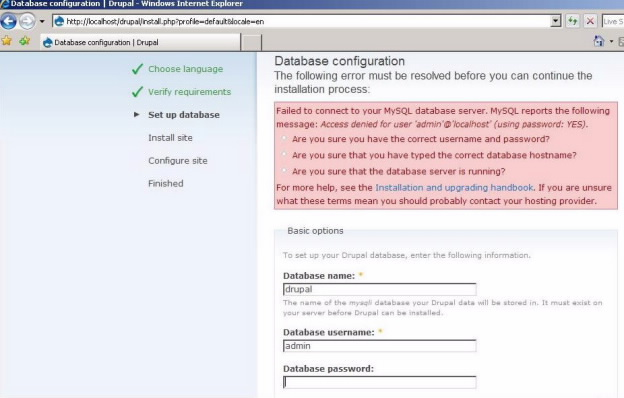
This is very important. Lots of problems come up at this point.
So before coming to this screen, create the database “drupal” with the default credentials “root” and blank(nothing) for password.
So under Database configuration:
- Database name: drupal (which you have created using mysql gui tools)
- Database username: root
- Database password : empty
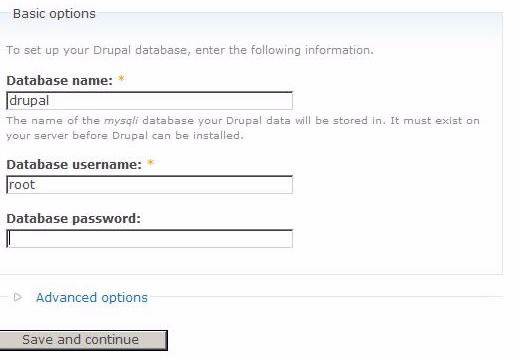
Leave the default values in “Advanced options”. Click Save and continue.
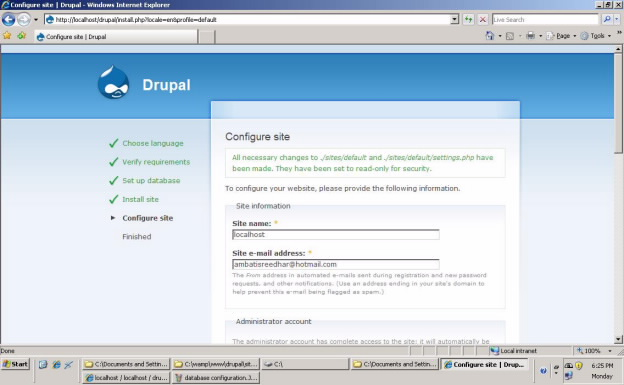
“Set up database” and “Install site” are automatically checked.
In Configure site screen, under Site Information section, give
- Site name: localhost
- Site e-mail address: email@hotmail.com
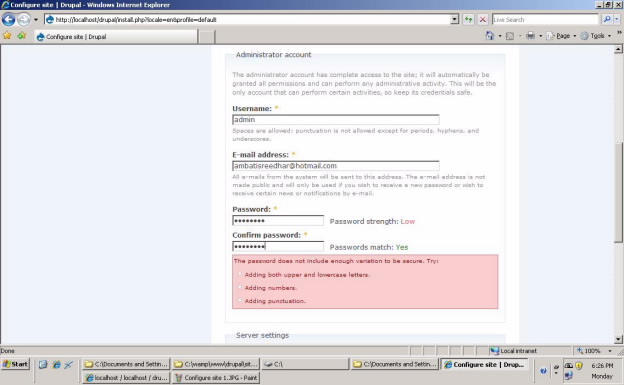
In the same Configure site screen, under Administrator account section, give:
- User name: admin
- Email address: email@hotmail.com
- Password: password
- Confirm password: password
There is no need to change Server settings.
Remember the user name and password which are used for logging into drupal site with administrator credentials.
Click Save and continue button.
This completes Drupal installation.
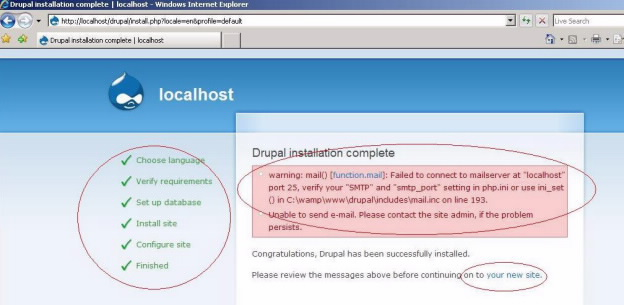
Don’t worry about the error message that mail was not configured.
On the left side, all are checked.
Click on “Your new site” link. Admin screen appears.
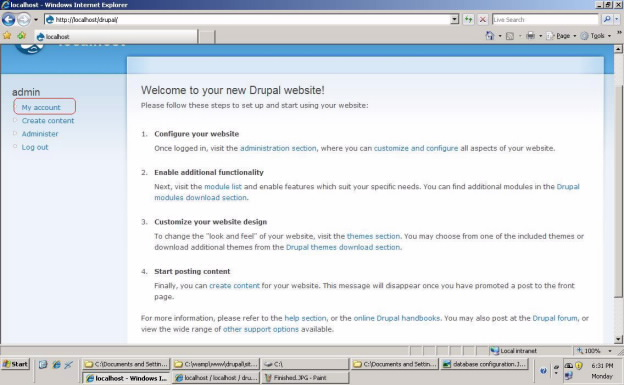
Click on “My Account” link on the left side
Login with admin as username and password as password.
Then this screen appears:
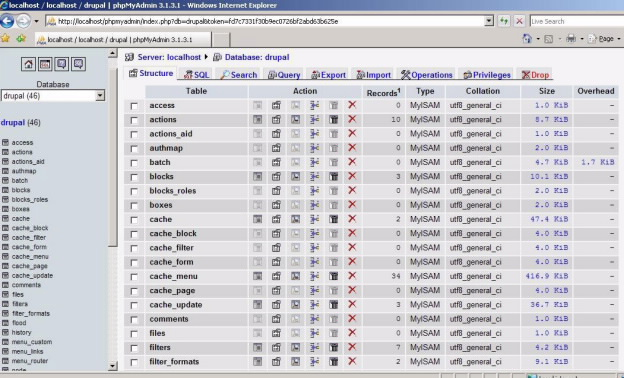
Left click on right side bottom corner WampServer icon and click on phpMyAdmin.
Notice that after the installation, 46 tables are created automatically.